This section explains how to install, license and remove the Easysoft XML-ODBC Server on supported Windows and Unix platforms.
The Windows installation can be carried out by anyone with local administrator privileges for the target machine.
The Unix installation assumes you are, or have available for consultation, a system administrator.
There are three ways to obtain the Easysoft XML-ODBC Server:
Select Download from the Easysoft XML-ODBC Server section of the website and then choose the platform release that you require.
First time visitors must complete the new user form and click Register. Note that your personal Internet options may require you to login and click Continue if you have previously registered.
Change to the pub/xml-odbc directory and then choose the platform release that you require.
The name of the Easysoft XML-ODBC Server install file varies from platform to platform, but is of the form:
where "x" is the major version number, "y" is the minor version number and "z" is the build index, which is incremented when minor changes are made.
"platform" will vary depending on the operating system distribution you require and you may come across files of the form:
within specific Unix platforms, where "platform-variation" refers to alternative versions available for a single platform.
| Select the highest release available for your platform within your licensed major version number (installing software of a different major version number requires a new Easysoft license). |
Unix filenames may also be suffixed with .gz for a "gzipped" archive, .bz2 for a "bzip2ed" archive, or .Z for a "compressed" archive.
There are documentation and example files which you are recommended to keep for future reference.
The Unix installation also provides the unixODBC driver manager (Windows already has one).
You can now download a file and begin the installation process.
Refer to the section relevant to your platform to continue:
1. Execute the file distribution that you downloaded in Obtaining the Easysoft XML-ODBC Server.
| Please shut down other Windows programs before installing. In particular, Microsoft Outlook can cause the installation routine to pause for several minutes when you start it. |
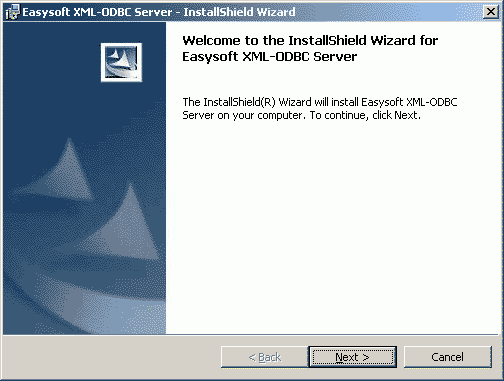
There will be a short delay while setup prepares the wizard to guide you through the rest of the install procedure before the Welcome dialog box is displayed:
The License Agreement dialog box is displayed:
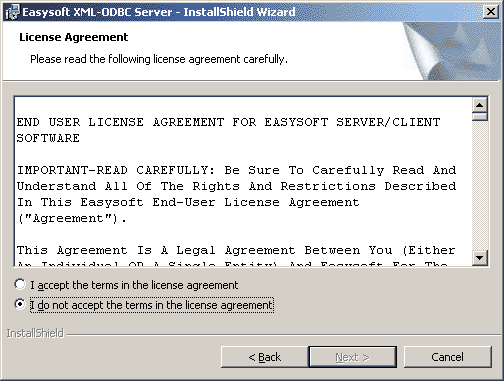
3. Click I accept the terms in the license agreement and then click Next to continue with the installation if you accept the License Agreement.
If you do not agree with the License Agreement click Cancel to exit the installation and then refer to the Easysoft License Agreement for more information (see Contact Details if you have any questions about the licensing procedure).
The Customer Information dialog box is displayed:
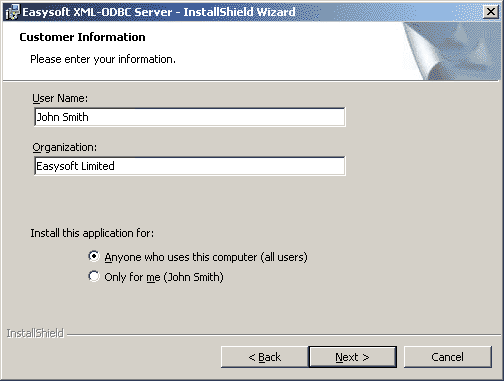
4. Enter your name and the name of your company. Then click Next to continue.
| The name and company that you enter here will become the defaults in the License Manager later on. |
The Setup Type dialog box is displayed:
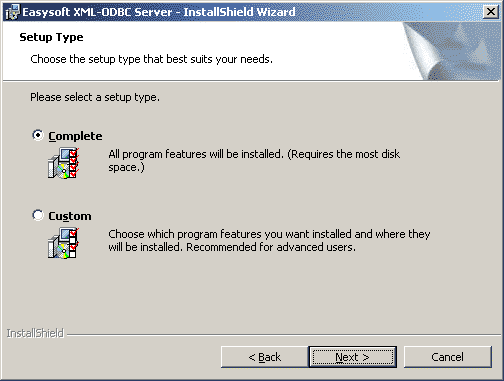
5. Select Complete to install all components (the server, License Manager, documentation and client examples). This is recommended for developers and administrators.
Select Custom to select the components to be installed.
If you selected Custom, a checklist of items to install is displayed on the Custom Setup dialog box:
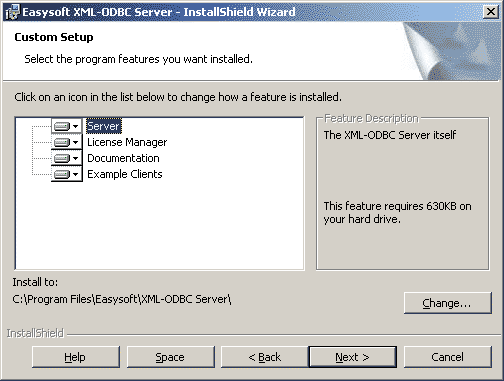
Select the items required for installation and click Next.
The Ready to Install the Program dialog box is displayed:
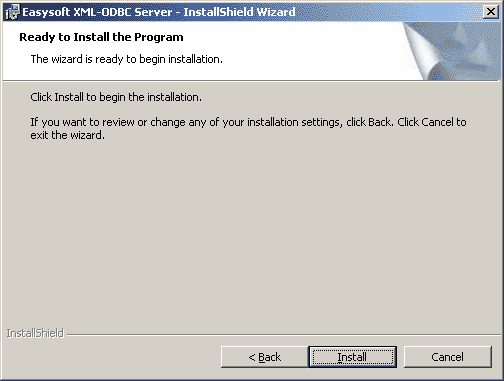
There is now a short wait while the relevant Easysoft XML-ODBC Server components are copied and configured.
The InstallShield Wizard Completed dialog box is displayed:
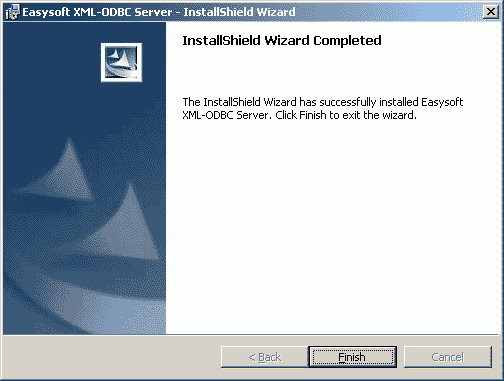
The installation is now complete (although you may be asked to restart your machine if certain files have been overwritten).
A new Programs>Easysoft>Easysoft XML-ODBC Serverprogram group is added with links to additional documentation, product newsgroups and the Easysoft web site.
This section explains how to remove the Easysoft XML-ODBC Server from your Windows system.
1. Select Start > Settings > Control Panel and then double-click the Add/Remove Programs icon.
A list is displayed of applications that can be automatically removed.
2. Select Easysoft ODBC-XML Server and click the Add/Remove button.
3. Click Yes to confirm that you wish to remove the Easysoft XML-ODBC Server and all its components.
The system begins to remove all the components.
You will be prompted for further advice on the removal of shared DLLs if they seem not to be required.
4. It is generally safer not to remove shared DLLs, but if you feel confident with the registry (i.e. your system has had relatively few programs installed or removed, and you are confident that DLLs are not shared by any other products on your machine) then click Yes or Yes to All to continue.
If you have any doubts (e.g. uninstall procedures have failed in the past) then click No or No to All.
The uninstall process is now complete and all the Easysoft XML-ODBC Server components removed from your system.
Note that any license codes that you have obtained for either the Easysoft XML-ODBC Server or any other Easysoft products are held in the registry and that these are not removed when the Easysoft XML-ODBC Server is uninstalled.
If a product is no longer required, a license code can be manually removed from:
Do not delete the license code if the Easysoft XML-ODBC Server is to be reinstalled, or it will be necessary to re-license.
| License codes are machine-specific and cannot be transferred from one computer to another. If the Easysoft XML-ODBC Server is reinstalled on a different machine, it will be necessary to re-license |
Although this section covers a range of platforms and the precise output may vary from system to system, the installation process is essentially the same.
The Unix installation routine has the following requirements:
If any of these commands are missing they can be obtained from the Free Software Foundation (http://www.fsf.org).
1. Log on to your Unix machine as the root user.
2. Download the Easysoft XML-ODBC Server (see Obtaining the Easysoft XML-ODBC Server).
3. Place the distribution file in a temporary directory on your Unix machine.
4. Change to the directory in which the distribution file resides.
5. Extract the installation files from the distribution file:
If the distribution file has been gzipped (i.e. the filename ends in .gz), then use:
gunzip xml-odbc-x.y.z-platform.tar.gz
If the distribution file has been bzip2ed (i.e. the filename ends in .bz2), then use:
bunzip2 xml-odbc-x.y.z-platform.tar.bz2
If the distribution file has been compressed (i.e. the filename ends in .Z), then use:
uncompress xml-odbc-x.y.z-platform.tar.Z
6. If the distribution file has not been compacted at all (i.e. the filename ends in .tar), then it is ready for extraction:
tar -xvf xml-odbc-x.y.z-platform.tar
The tar program creates a directory with the same name as the tar file (without the final .tar) containing further archives, checksum files, a script called install and a text file called INSTALL.
It also contains a versioned directory to ensure that any shared components already installed by other Easysoft products are only overwritten if those included in this distribution are newer.
| If you do not wish to keep the original downloaded distribution file you can now delete it safely. |
7. Change into the newly-created xml-odbc-x.y.z-platform directory.
8. Read and accept the terms of the license applicable to your installation before you use the software.
There are two license files provided in the archive: one that applies if you are installing just the Easysoft XML-ODBC Server sample client applications and another that applies if you are installing the either the Easysoft XML-ODBC Server or both the Easysoft XML-ODBC Server sample client applications and the Easysoft XML-ODBC Server.
10. If you have read and agree to the Easysoft License Agreement, type yes and then press <Enter> to continue.
11. The script pauses to allow you to read its output so far. Up to this point it has checked the following:
12. Press <Enter> to continue.
The script checks the archive package, with three possible outcomes:
13. If the check failed because of missing components, enter "y" to continue regardless or "n" to quit and investigate the missing components.
If the check was carried out and the files failed then the files have been damaged:
If the files passed the check then you are asked for a directory in which to place the easysoft installation directory tree.
The default is /usr/local, which would be the normal location to install software for system-wide use.
If you wish to install the software in another directory then specify a directory name here.
If you have any other Easysoft products already installed, then choose the same directory that you chose for the other Easysoft product(s).
The installation script will create a directory called "easysoft" under the directory you specify here, into which all the Easysoft XML-ODBC Server files will be placed.
14. If you have root permission and want a typical system-wide installation, press <Enter> to place the easysoft directory in /usr/local/.
If you do not have rootprivileges, or wish to select a custom installation directory, type the desired directory and press <Enter>.
The script now creates the "easysoft" directory under the directory you specified. If your chosen directory does not exist, you will be asked whether or not the script should create it.
16. If the chosen directory already contains an "easysoft" directory, the script warns that you may be installing over a previous Easysoft XML-ODBC Server installation (this conflict can also arise if you have another Easysoft product installed). Normally you should continue with the installation to install into the existing "easysoft"directory. Enter y or n.
If you chose a directory other than /usr/local the script creates a symbolic link /usr/local/easysoft, pointing to the "easysoft" directory in the directory you specified, in order to ensure that licensing will work.
17. Press <Enter> to continue.
The script now offers to install the copy of the unixODBC driver manager contained in the Easysoft XML-ODBC Server distribution.
The unixODBC driver manager enables an application to load whichever driver is required to access the data source at runtime.
If you do not have the unixODBC driver manager on your system then the Easysoft XML-ODBC Server will not function correctly.
The Easysoft XML-ODBC Server install routine will examine your system in an attempt to locate an already installed version of unixODBC, but you MUST install the unixODBC driver manager UNLESS you already have version 2.2.2 (or greater) installed, as the Easysoft XML-ODBC Server takes advantage of essential routines that this version introduced for handling Unicode characters (see "The unixODBC driver manager and Unicode").
Having the unixODBC driver manager installed multiple times on your machine does not do any harm, but if applications are linked against different versions which have been built with different sysconfdir settings, then each driver manager may link to a different data source.
| unixODBC is an open source project sponsored by Easysoft and other industry members. It is rapidly becoming the standard driver manager across the Unix data access community. Comprehensive documentation can be found at http://www.unixodbc.org. |
18. Press <Enter> to continue and then choose whether to install unixODBC.
| If you would prefer, you can download the entire unixODBC source distribution from ftp://ftp.easysoft.com/pub/unixODBC and install it independently. |
19. If you do not wish to install unixODBC, enter n.
If you wish to install unixODBC, enter y.The script pauses at this point. Press <Enter> to continue and the script extracts the unixODBC files.
| Depending on your platform this installation of the unixODBC driver manager may not contain the GUI components of unixODBC. |
20. The script pauses. Press <Enter> to continue.
The Easysoft XML-ODBC Server documentation files are extracted.
The script asks you whether you want to install the sample client files for the Easysoft XML-ODBC Server.
21. Enter n to skip installing the sample client files.
Enter yto install the sample client files. The script pauses at this point. Press <Enter> to continue and the script extracts the sample client files.
22. Press <Enter> to continue.
The script asks whether you wish to install the Easysoft XML-ODBC Server.
This allows you to make data sources on the local machine available to remote client applications using the Easysoft XML-ODBC Server.
23. If you wish to skip the Easysoft XML-ODBC Server install, enter "n" and go to Completing the installation, which displays a final checklist.
24. The script pauses at this point. Press <Enter> to continue.
The files necessary for the Easysoft XML-ODBC Server are extracted.
25. Press <Enter> to continue.
The script now begins to configure the Easysoft XML-ODBC Server under the {x}inetd "super-server" and asks whether you would like to install the services and inetd/xinetd entries.
| Some new Linux distributions (in particular) use xinetd, rather than inetd. The installation recognizes and correctly handles the configuration of either. For more information about xinetd visit the web site at https://www.comparitech.com/net-admin/xinetd-primer/. |
26. If you want to skip these changes, enter n and the installation terminates. Go to Completing the installation.
The script now amends the /etc/services and {x}inetd configuration files.
27. If either of these files is missing or protected against writing, then you must supply their locations as prompted.
| You must use full path and file names in order to specify the relevant configuration file, and not just the file names themselves. |
The script looks for an existing entry in the services file for the default service name of the Easysoft XML-ODBC Server. If one already exists then you are prompted for a decision.
28. If there is no service name conflict, then go to Completing the installation. If there is a service name conflict, read on.
If you are reinstalling the Easysoft XML-ODBC Server (to replace an older installation), enter r to replace the existing entry.
If you want to have two different Easysoft XML-ODBC Server services running beside one another and you wish to define a new service name for the Easysoft XML-ODBC Server then type d, press <Enter> and then enter your chosen new name for the service.
29. The script looks for an existing entry in the services file for the Easysoft XML-ODBC Server default port.
If an entry already exists then you are asked to choose another port. Enter another port number and the script will check whether the new value conflicts with any other services.
30. If the script cannot determine what shell to use for the {x}inetdconfiguration file you must enter one at the prompt. It will now be read again so that any changes take effect, and the Easysoft XML-ODBC Server startup script is installed.
31. Press <Enter> if necessary to return to the shell prompt.
You can remove the installation files.
Unless you specified the installation directory (at step 14) to be within the temporary directory, then you can safely remove the temporary directory and all its contents.
This section explains how to remove the Easysoft XML-ODBC Server from your Unix system.
Although there is no automated method of removing the Easysoft XML-ODBC Server, the operation is quite simple.
| To uninstall the Easysoft XML-ODBC Server requires the same privileges as the user who performed the installation (normally root). |
There are four steps to uninstalling the Easysoft XML-ODBC Server under Unix:
1. Close down all client programs attached to your service.
3. Make a backup of the /etc/services configuration file.
4. Open /etc/services in your editor.
5. Look at the end of the file for two lines of the format:
Note that you may have specified a different name to the default of esxmlodbcserver during the Easysoft XML-ODBC Server installation.
6. Delete both service entries and save the file.
7. Make a backup of the /etc/inetd.conf configuration file.
8. Open /etc/inetd.conf in your editor.
9. Look at the end of the file for two lines of the format:
esxmlodbcserver stream tcp nowait root /bin/sh /bin/sh /usr/local/easysoft/xml-odbc/server/server
esxmlodbcserver_c stream tcp nowait root /bin/sh /bin/sh /usr/local/easysoft/xml-odbc/server/serverc
Note that, as with the services file, you may have specified a different name to the default of esxmlodbcserver during the Easysoft XML-ODBC Server installation.
There should be one entry in inetd.conf for every entry in the services file.
10. Delete both inetd entries and save the file.
11. Use the ps command to find the Process ID (PID) of the inetd process and send a Hangup signal to tell it to re-read the configuration files:
xinetd uses a configuration file of /etc/xinetd.conf (by default), which can either contain the names of the services and what to do with them, OR (on some Red Hat machines, for example) an includedir setting which points to a directory where those services are defined (one per file).
You should have been made aware of which method your machine uses from the original installation procedure (see Installing the Server software).
In the former case the Easysoft XML-ODBC Server install adds a service entry to /etc/xinetd.conf and in the latter case it creates a new service file called esxmlodbcserver containing the Easysoft XML-ODBC Server service settings.
There are therefore two ways to delete the Easysoft XML-ODBC Server service from xinetd:
12. Make a backup of the xinetd configuration file, open it in your editor, look for two lines similar to the following:
(where esxmlodbcserver is the name as specified in the services file, so there should be one entry in xinetd.conf for every entry you saw in the services file), delete both entries and save the file.
Delete the esxmlodbcserver file in the directory to which the includedirsetting in xinetd points.
13. Use the ps command to find the Process ID (PID) of the xinetd process and send either a SIGUSR1 or SIGUSR2 signal (consult the xinetd(8) man page for the correct option) to tell it to re-read the configuration files:
14. Change directory to<InstallDir>/easysoft/xml-odbc and delete the directory tree "Documentation" (where <InstallDir> is the installation path specified at install time).
15. You can also delete the INVENTORY.txt and README.txt files from <InstallDir>/easysoft/xml-odbc.
16. Change directory to <InstallDir>/easysoft/xml-odbc and delete the directory tree "clients" (where <InstallDir> is the installation path specified at install time).
17. Change directory to <InstallDir>/easysoft/xml-odbc and delete the directory tree "server" (where <InstallDir> is the installation path specified at install time).
18. If you have no other Easysoft products on your system you can delete the entire "easysoft" directory tree, including the "xml-odbc" directory beneath it.
If there are other files in the directory tree (i.e. you have other Easysoft products installed) then you can delete the "xml-odbc" directory, but you must not remove the easysoft directory, because it will contain your license keys and other important files.
rm -r<InstallDir>/easysoft/xml-odbc
19. If you left the installation files on your system then you may wish to remove them at this point.
The uninstall process is complete.
Any licenses you obtain for the Easysoft XML-ODBC Server and other Easysoft products are stored in the <InstallDir>/easysoft/license/licenses file.
After uninstalling the Easysoft XML-ODBC Server, unless you have deleted this file, you will not need to relicense the product when you reinstall or upgrade.
However, for security purposes you may want to make a copy of <InstallDir>/easysoft/license/licenses before uninstalling the Easysoft XML-ODBC Server.
© 1993 - 2026 Easysoft Limited. All rights reserved. Oracle is a registered trademark of Oracle Corporation and/or its affiliates. Other trademarks and registered trademarks appearing on easysoft.com are the property of their respective owners.