Accessing ODBC data sources from WebLogic
The Easysoft JDBC-ODBC Bridge allows WebLogic applications to access any ODBC data source as if it were a JDBC data source. The Bridge provides Unicode support and is fully compatible with WebLogic connection pooling.
These instructions assume that you have installed the server component of the Easysoft JDBC-ODBC Bridge and completed the Getting Started guide: successfully accessing an ODBC data source that you can now reference in your WebLogic configuration.
To configure the WebLogic examplesServer server to work with the Easysoft JDBC-ODBC Bridge:
- Add
EJOB.jar(specifying the full path name) to theCLASSPATHenvironment variable in the WebLogic server startup script:startExamplesServer.sh
located in:
bea/weblogic700/samples/server/config/examples
within your WebLogic installation directory.
- Restart the server by running the file you've just updated:
./startExamplesServer.sh
- Run the WebLogic Administration Console from a browser:
http://server:7001/console
Substitute
serverwith the name of the WebLogic machine.Note that
7001is the default WebLogic port number. The port may be different, depending on the options you chose during installation. - Enter your WebLogic password, if required, and choose Sign In to display the WebLogic Administration Console menu page.
- Having logged on, choose Connection Pools in the JDBC section within Services Configurations.
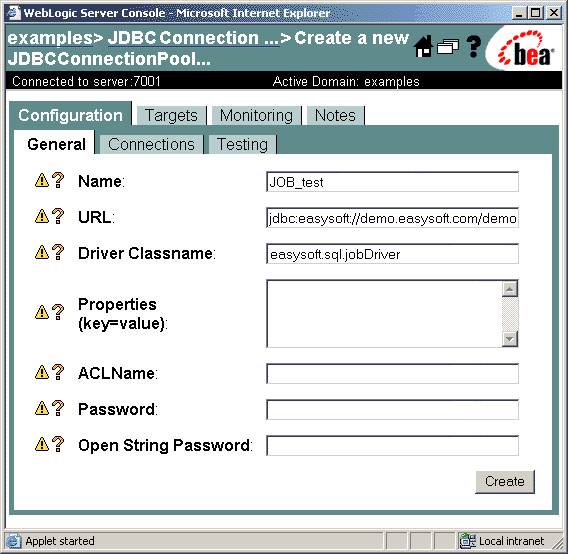
- Choose Configure a new JDBC Connection Pool... to create a Connection Pool entry for the Easysoft JDBC-ODBC Bridge, setting URL to a valid Easysoft JDBC-ODBC Bridge URL, such as
jdbc:easysoft://myserver/mydsn, and Driver Classname toeasysoft.sql.jobDriver:
- Choose Create and then Apply to add your new Connection Pool entry.
You now need to attach a target database server to your Connection Pool:
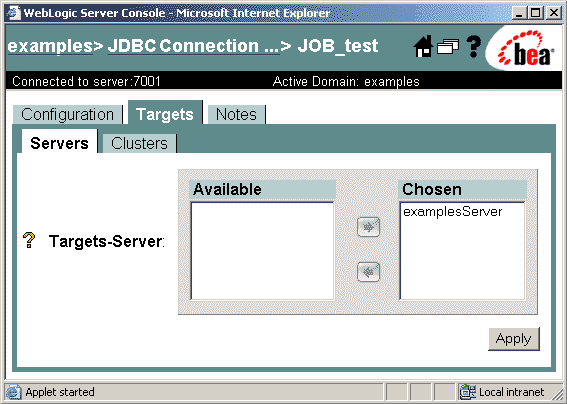
- Choose the Target tab.
- Highlight the server you want from the Available list, choose the right arrow button to add it to the Chosen list, and then choose Apply:

You now need to create a JDBC Data Source:
- Choose Data Sources on the table of contents.
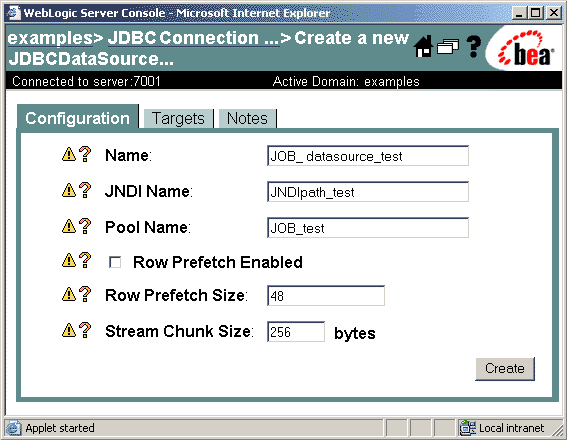
- Choose Configure a new JDBC Data Source... to create a Data Source entry for the Easysoft JDBC-ODBC Bridge. Set Name to a data source name of your choice, JNDI Name to a JNDI name of your choice, and Pool Name to your Connection Pool name (for this tutorial the name is
JOB_test):
- Choose Create and then Apply to add your new Data Source entry.
You now need to attach a target database server to your Data Source.
- Choose the Target tab, highlight the Server you require from the Available list, choose the right arrow button to add it to the Chosen list, and then choose Apply.
The configuration is now complete.